
Brownspots on a new stainless-steel enclosure do not automatically mean the wrong alloy was supplied. Sometimes the grade is part of the problem; more often, the location of the stain points to chloride residue, free iron, a tight crevice, or an unfinished weld.
Here is how we separate finish-related appearance issues from true corrosion—and how we write the material and finish requirements before a part reaches the floor.
1.Why brushed 304 stainless steel can still rust
Type 304 is an austenitic stainless steel listed as UNS S30400 in ASTM A240. Its specified composition includes 18.0–20.0% chromium and 8.0–10.5% nickel. Chromium is the important part of the corrosion story: on a clean surface exposed to air or another oxygen-containing environment, the alloy forms a very thin chromium-rich passive film.
That film is not a paint layer, and a visible scratch does not create a fixed countdown before the part rusts. A clean stainless surface can repassivate on its own. The practical problem is what remains on or around that surface: embedded carbon-steel particles, weld oxide, chloride deposits, grinding residue, or a crevice that stays wet. Those conditions can prevent the surface from maintaining the corrosion resistance expected from the grade.
So, can brushed 304 stainless steel rust? Yes. It is corrosion-resistant, not corrosion-proof. But brushing by itself is rarely a complete diagnosis.
What the stain may be telling you
Appearance gives useful clues, but it does not identify the mechanism by itself. In our experience, checking where the stain starts is more useful than debating the alloy from a photograph.
|
Observation |
Likely contributors |
Useful next check |
|
Small brown dots after fabrication or shipping |
Free iron, steel dust, wet packaging, or contaminated handling |
Clean a test area, inspect for pitting, and use an agreed free-iron test if required |
|
Staining beside a weld |
Heat tint, incomplete scale removal, or an uncleaned heat-affected zone |
Review weld cleanup and inspect the surface beneath the discoloration |
|
Attack at a gasket, hem, or lap joint |
Retained moisture and concentrated chlorides in a crevice |
Open the joint if practical and review drainage, sealing, and cleaner chemistry |
|
Color change beneath protective film |
Trapped moisture, adhesive residue, or film left on too long |
Remove residue with a compatible cleaner; verify that the base metal is not pitted |
2.What a brushed finish changes—and what it does not
A brushed finish is a directional abrasive finish. ASTM A480 describes No. 4 as a linearly textured surface that may be produced by mechanical polishing or rolling. Industry guidance often associates it with a 120–150 mesh abrasive, while suppliers may use different belt sequences to reach a similar appearance. That is why two sheets both sold as “No. 4” can differ in grain width, reflectivity, color, and roughness.
World Stainless notes that average roughness for a No. 4 finish may generally be up to about Ra 0.6 µm, but it treats that value as orientation—not a universal acceptance limit. If roughness affects cleanability, sealing, or appearance, put the limit and measurement direction on the drawing instead of relying on the finish name alone.
Brushing adds directional grooves that soften reflections and make minor handling marks easier to blend. A coarse or uneven finish can also retain more residue. The larger risk on a shop-applied finish is contamination: an abrasive belt, wheel, table, or brush that has contacted carbon steel can transfer iron to the stainless surface.
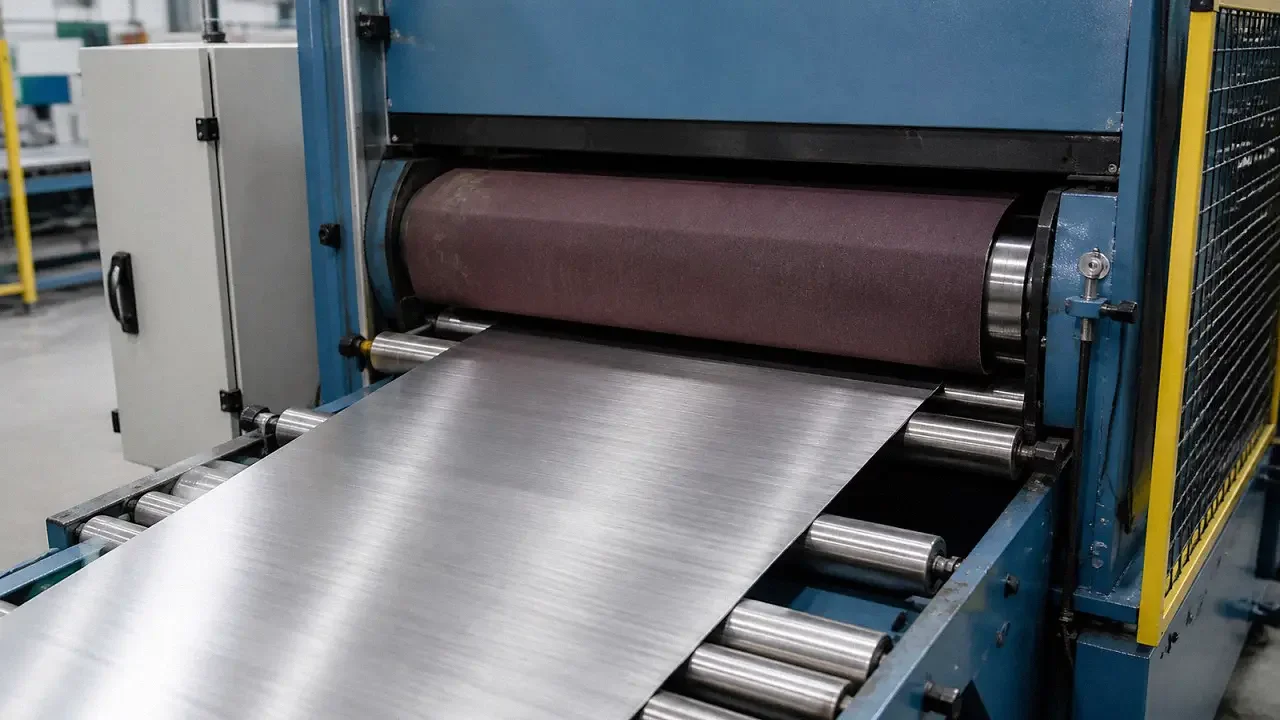
Grain consistency is a fabrication requirement
On an enclosure, adjacent panels with grain running in different directions look mismatched even when the alloy and grit are identical. Grain also becomes difficult to blend across welds and formed corners. A common pitfall we see is a purchase order that says only “brushed stainless,” leaving the visible face, grain direction, protected side, and weld blending open to interpretation.
For prefinished sheet, a removable protective film can reduce handling marks during laser cutting and forming. The film still needs a controlled removal point: too early invites scratches, while leaving it through welding or long outdoor storage can create adhesive and moisture problems. When welding crosses a cosmetic face, plan the blending sequence before fabrication; aggressive rework can round edges, thin a local area, and create a patch that reflects light differently from the parent sheet.
3.Where corrosion usually starts on fabricated sheet-metal parts
When a fabricated 304 part develops rust staining, we normally look at the environment, geometry, and shop history together. Four locations deserve attention first.
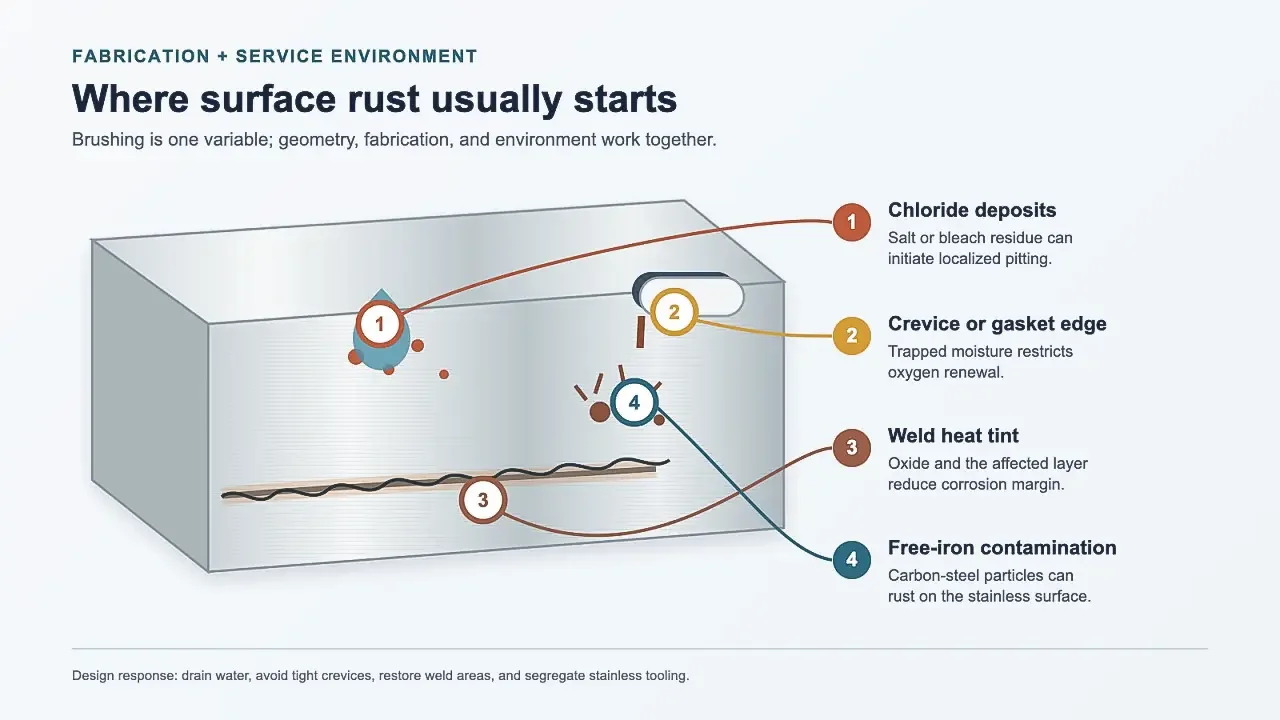
Chlorides and retained moisture
Type 304 performs well in many dry indoor and mildly corrosive services, but chlorides reduce its margin against pitting and crevice corrosion. Coastal salts, deicing residue, brine, and chloride-bearing cleaners can become more aggressive as water evaporates. Horizontal ledges, unsealed hems, gasket edges, and poorly drained bottoms give that residue time to concentrate.
Water is not automatically a failure condition. The combination of chloride level, temperature, contact time, oxygen access, finish, and geometry matters. Sloping a surface, adding a drain path, or eliminating a tight lap can be as important as changing alloy.
Weld heat tint and the layer beneath it
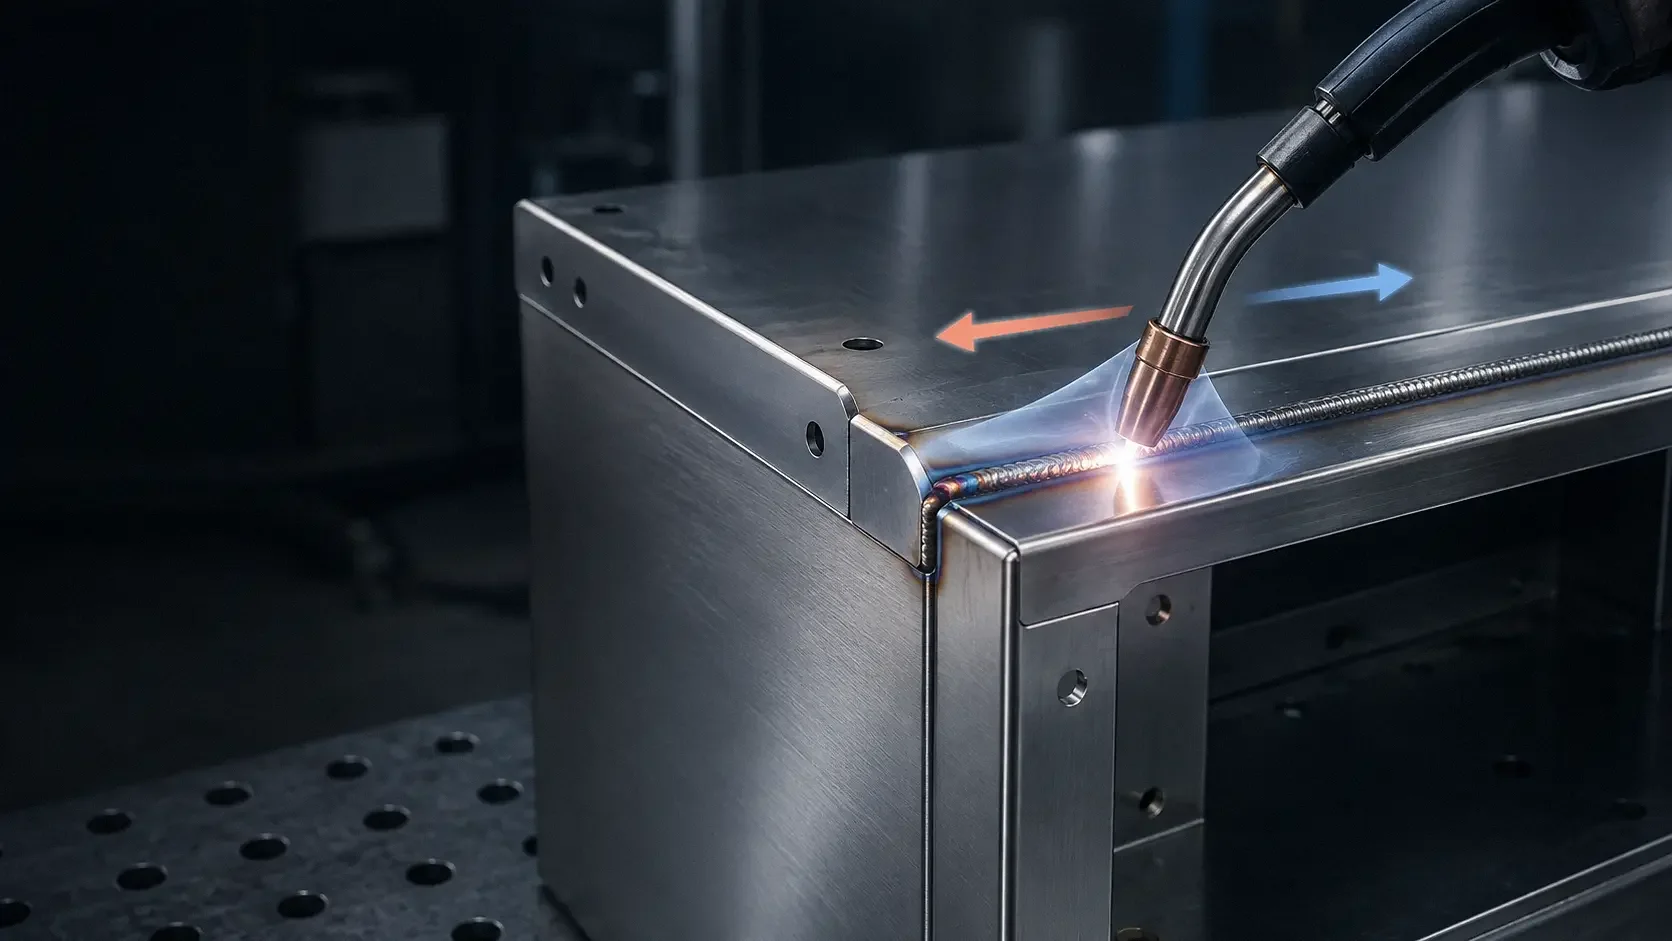
Colored oxide beside a stainless weld is more than a cosmetic issue. Welding can leave oxide scale and a chromium-depleted layer beneath it, which reduces local corrosion resistance. Controlled pickling or electrochemical cleaning can remove the affected surface. Mechanical blending can be appropriate on a cosmetic panel, but the abrasive must be stainless-dedicated and the final surface needs to match the surrounding grain. Chemical passivation alone is not a substitute for removing heavy heat tint or scale.
Free iron from the shop
Carbon-steel dust and particles can come from shared grinding areas, forming rolls, carts, clamps, wire brushes, or steel wool. Those particles rust in a moist environment and may create orange spots on an otherwise sound 304 surface. Segregated tools, covered worktables, clean slings, stainless-dedicated abrasives, and control of nearby grinding dust are straightforward ways to reduce the risk.
4.How to specify a brushed finish on the drawing
A finish callout should be written so that the buyer, sheet supplier, fabricator, and inspector are looking for the same result. “304 stainless, brushed” leaves too many variables open.
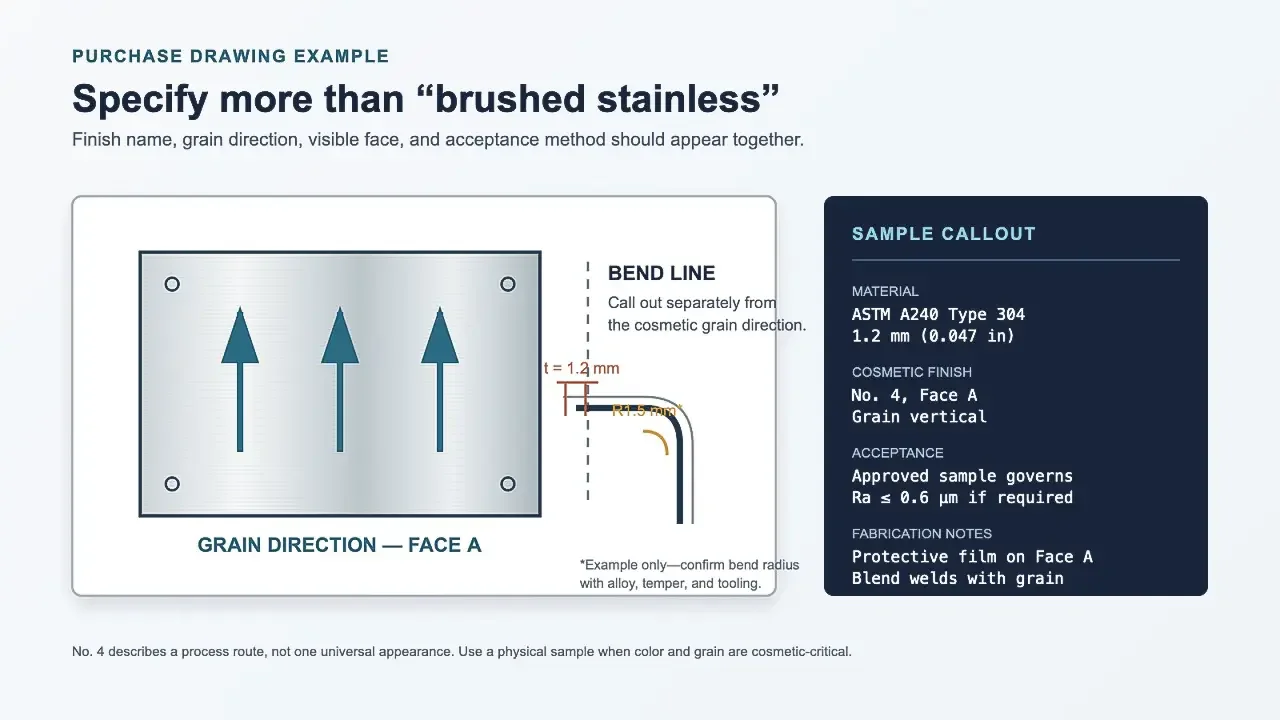
A practical callou
|
Example drawing note—adjust to the actual part MATERIAL: ASTM A240 Type 304/304L, 1.2 mm (0.047 in) COSMETIC FINISH: ASTM A480 No. 4 on Face A; grain vertical ACCEPTANCE: Approved finish sample governs; Ra ≤ 0.6 µm only if functionally required FABRICATION: Protect Face A; blend visible welds with the specified grain; no carbon-steel tooling |
The callout should also identify which surfaces are cosmetic, whether weld seams may remain visible, the acceptable scratch standard, and when protective film comes off. For appearance-critical work, a signed physical sample is more reliable than a grit number because belt condition, pressure, feed rate, alloy source, and lighting all influence the result.
For enclosures and equipment panels, common starting thicknesses include 0.036, 0.048, and 0.060 in (about 0.9, 1.2, and 1.5 mm). Gauge labels can vary by metal type and supplier, so decimal thickness is the clearer purchasing requirement. For annealed 304 sheet, an inside bend radius around one material thickness is often a workable starting point, but temper, thickness, rolling direction, bend angle, tooling, and cosmetic requirements can justify a larger radius. The brushed grain direction and the mill rolling direction should not be assumed to be the same; specify the cosmetic grain and the bend orientation separately.
5.Cleaning, passivation, and post-fabrication handling
The word passivation is used loosely in purchasing documents. ASTM A380 distinguishes the stainless steel’s natural formation of a passive surface from chemical treatments used to remove foreign iron or accelerate formation of a clean passive film. ASTM A967 covers nitric, citric, and electrochemical passivation treatments and includes several verification options.
The sequence matters. A chemical passivation bath will not reliably remove grease, weld scale, or a thick heat-tint layer. The part needs to be clean and properly descaled first.
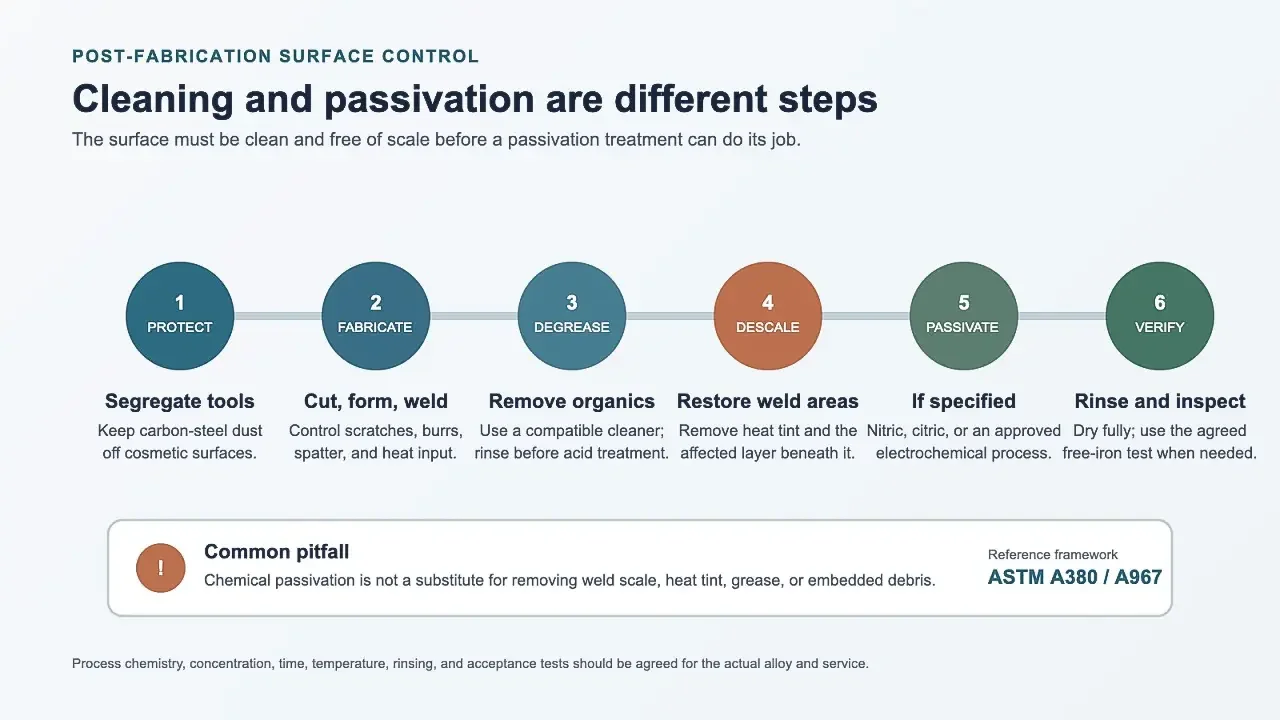
A workable post-fabrication sequence
- Protect and segregate. Keep stainless surfaces away from carbon-steel dust, shared wire brushes, and contaminated abrasives.
- Degrease. Remove oil, adhesive, ink, and shop soil with a cleaner compatible with stainless and the cosmetic finish.
- Remove scale and heat tint. Use an agreed pickling, electrochemical, or controlled mechanical process. Restore the directional finish where appearance matters.
- Passivate when specified. Define the treatment, applicable ASTM requirement, and any cosmetic constraints rather than writing only “passivate.”
- Rinse, dry, and verify. Residual chemistry should not remain in hems or threaded features. Select a verification test appropriate to the application and alloy.
A common pitfall we see is an acceptance requirement copied from another industry. A high-humidity or salt-spray test may be useful for one project and unnecessary for another. The drawing or purchase specification should connect the test to the actual risk—free iron, process residue, or corrosion performance—not simply add every available test.
Cleaning after installation
For routine service, start with a mild detergent and clean water, wipe in the grain direction, rinse, and dry. Avoid carbon-steel wool and brushes. Hydrochloric acid and chloride bleach are particularly troublesome for 304. If a facility procedure requires a chlorine-based disinfectant, the owner should define the chemistry, dilution, contact time, rinse, and material compatibility; “clean with bleach” is not a sufficient equipment specification.
6.Choosing between 304 and 316 without overspecifying
Type 316L adds roughly 2.0–3.0% molybdenum and generally provides more resistance to chloride pitting and crevice corrosion than 304. It also carries a material-cost premium and does not compensate for an unsealed crevice, retained cleaner, or carbon-steel contamination. The grade decision should follow the exposure.
|
Service condition |
Reasonable starting point |
What still needs attention |
|
Dry indoor enclosure; neutral routine cleaning |
304/304L; No. 4 on visible faces, 2B where appearance is not required |
Grain direction, handling protection, and separation from carbon-steel work |
|
Occasional washdown; low chloride; surfaces drain and dry |
304/304L may be suitable after a chemistry and geometry review |
Weld cleanup, rinse quality, crevices, and the actual cleaner concentration |
|
Coastal air, deicing salt, brine, or recurring chloride bleach |
316L usually provides more chloride margin |
Finish, drainage, fasteners, weld treatment, and maintenance remain important |
|
Warm, stagnant chloride service or appearance-critical exterior |
Application-specific grade and corrosion review |
A test coupon or documented service history may be more useful than a generic rule |
Two practical budget tradeoffs
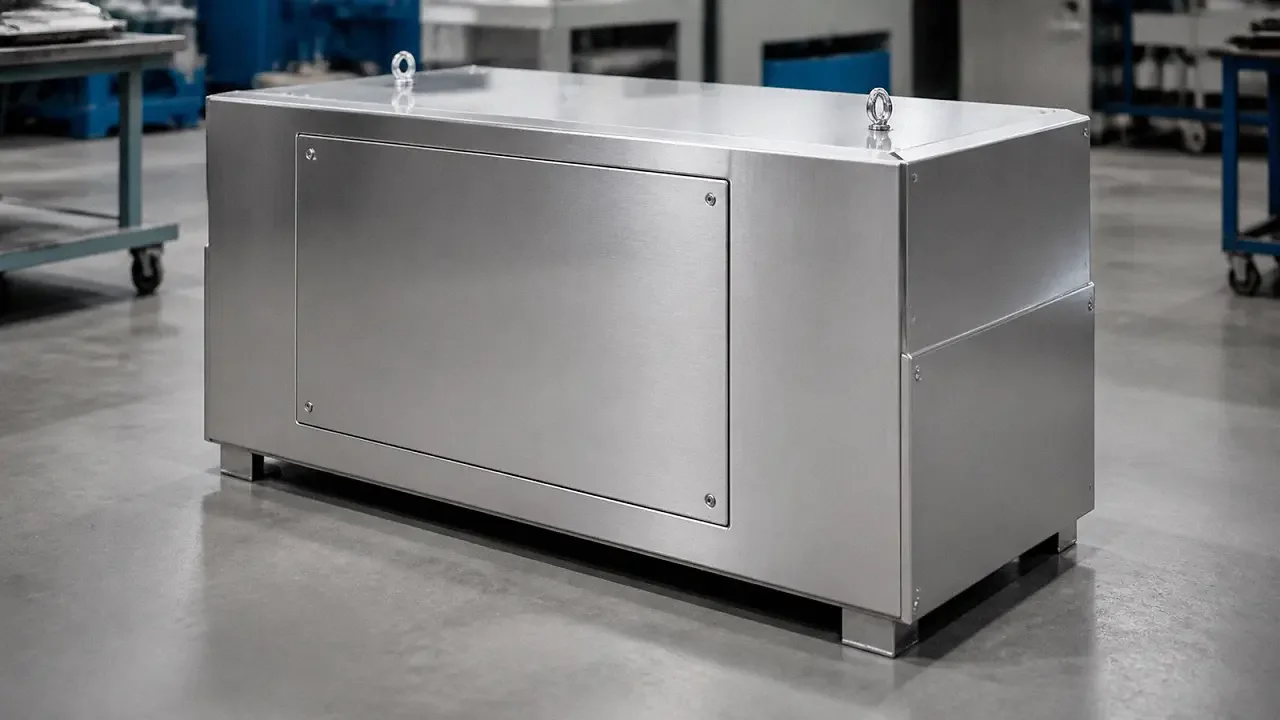
Indoor control enclosure. Use brushed 304 on the door and other visible panels, with 2B 304 for internal brackets and hidden panels. That keeps the same base alloy while avoiding cosmetic finishing where it adds no function. If welding or machining introduces contamination risk, specify the necessary cleanup and passivation scope instead of automatically applying the most extensive treatment to every part.
Coastal or washdown equipment.If an all-316L construction exceeds the target cost, consider 316L for the exposed skin, wetted components, drain details, and fasteners while keeping truly dry internal brackets in 304. This split works only when the enclosure actually prevents chloride-laden moisture from reaching the lower-grade parts and the bill of materials stays unambiguous. When exposure boundaries are uncertain, a single higher-grade material can be the lower-risk production choice.
What to verify before the parts ship
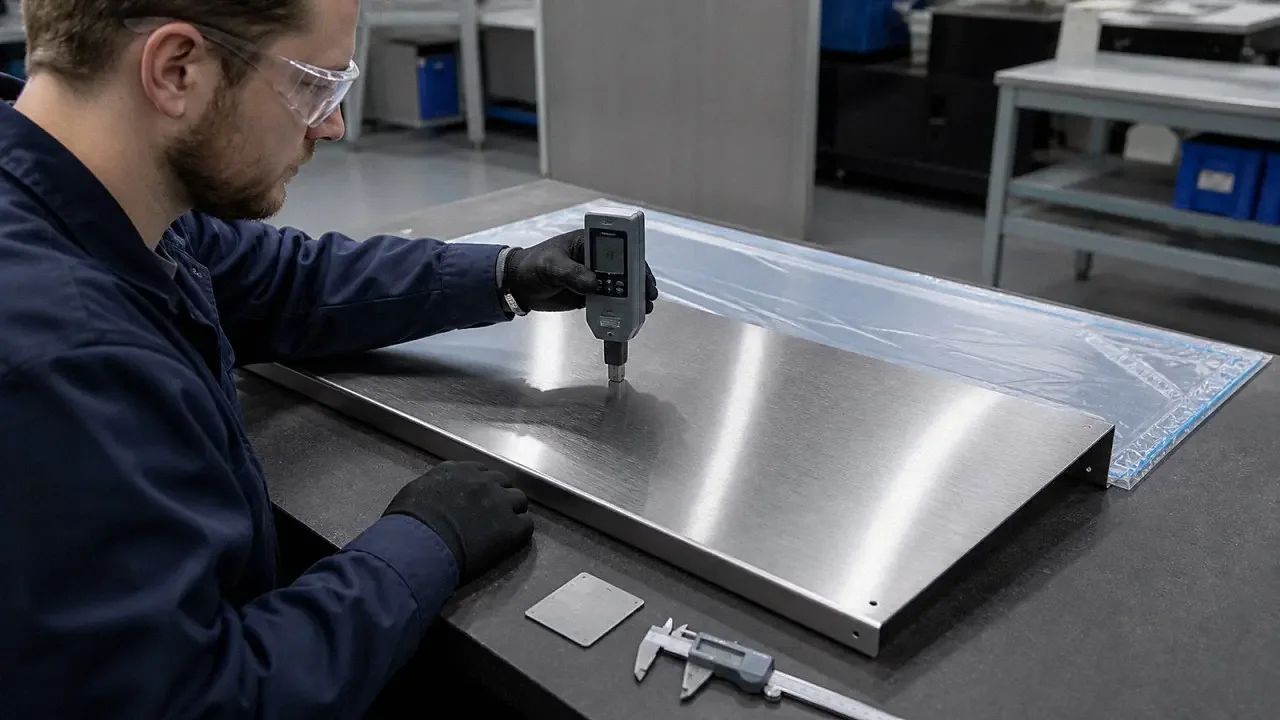
Material certificates and heat/lot traceability confirm the ordered grade. X-ray fluorescence PMI can help detect an alloy mix-up because 316 contains molybdenum and 304 does not, but handheld XRF does not reliably measure carbon; it should not be used by itself to distinguish 304 from 304L. Finish inspection should combine a controlled visual check against the approved sample with grain-direction, thickness, and roughness measurements where those items are specified.
7.The useful question is not simply “Will 304 rust?”
Brushed 304 stainless steel is a reasonable material for many indoor sheet-metal enclosures, panels, and equipment parts. Its service result depends on more than the alloy label: chloride exposure, drainage, joint geometry, weld cleanup, abrasive control, handling, and the way the finish is written on the drawing all affect the outcome.
For a new project, start with the actual cleaner and environment, then select the grade and geometry. After that, define the visible face, grain direction, finish reference, weld treatment, protection, and acceptance method. That sequence gives the designer and fabricator a practical basis for choosing 304, adding a surface treatment, or moving to 316L without treating any one option as a universal answer.
|
Engineering note The example values in this article are starting points, not a substitute for an application-specific material review. Chemical exposure, temperature, hygiene requirements, design life, and governing codes may require a different grade, finish, or verification plan. |